Let's Talk Turkey: Wet Brine or Dry Brine?
Posted by Julie on Nov 8th 2019
Thanksgiving is late this year, but that just gives us more time to plan ahead. While we’ve covered Thanksgiving side dishes and desserts, as well as how to make gravy, we’ve never talked turkey. That’s going to change here. One popular technique for cooking turkey is to brine it first. But what exactly does that mean, and how do you brine a turkey? We’ll discuss wet brining, dry brining, and the pros and cons of each.
Why Brine Your Turkey?
While we’ll cover different methods of brining in greater detail below, let’s start by explaining why you might consider brining your turkey. Whole turkeys are rather large, so they take a while to cook thoroughly. Depending on the size of your turkey, it may spend three to five hours in the oven. Because turkey meat is quite lean, it can dry out while cooking. Brining helps your turkey retain moisture so it’s more tender when you slice and serve it.

Whether you choose a wet brine or a dry brine, the key ingredient in both of these methods is salt, and the salt acts in the same ways. One, the meat absorbs the salt, which breaks the strands of protein in the meat. When the turkey cooks, those broken strands of protein can’t contract and release juice. The turkey stays moist and juicy, even the lean white meat that’s prone to drying out. Two, because the salt is absorbed into the meat during the time spent brining, your turkey is seasoned all the way through, not just on the surface.
Be sure to check your turkey to confirm it doesn’t already contain added salt. The Kitchn notes that turkeys labeled “kosher, enhanced, or self-basting” aren’t good candidates for brining. If you want to brine your bird, buy one that hasn’t been injected with a sodium solution.
What Is a Wet Brine?
A wet brine is essentially an extended salt water bath for your raw turkey. Your brining solution should contain one tablespoon of salt for every cup of water, and the salt should be fully dissolved before you add your turkey to the brine. Also, the brine and turkey need to stay cold, for the sake of food safety.
To make the process as quick and simple as possible, we suggest following this smart guidance from The Spruce Eats. Determine how much water you’ll need for your brining solution, and then measure out the appropriate amount of salt. Rather than boiling the full amount of water, boil only a cup or two, and dissolve all of the salt in it. Cool down the concentrated salt solution -- add ice to it, or put it in the refrigerator -- and then combine it with the remainder of the water for your brining solution.
Even a small turkey takes up a good amount of space, so consider what container you’ll use for brining. A stainless steel stockpot or plastic tub will work. A brining bag is also a smart idea, as it helps prevent brining solution from spilling and keeps conditions in your refrigerator sanitary. Try this tip from The Kitchn: Use one of your refrigerator drawers as a brining container. Your turkey won’t take up extra shelf space, you won’t need to look for a separate container, and your turkey will stay cold. We think this idea is brilliant. Just ensure your refrigerator drawer isn’t cracked, and use a brining bag to be safe.

The Kitchn and The Spruce Eats offer different strategies for combining turkey and brine, and we’re going to opt for siding with The Kitchn. Put your turkey inside the empty brining bag (which should already be inside your brining container), and then add the brine. This approach will minimize splashes and spills, and there should be no danger of your container overflowing. In fact, we suggest adding the brine a cup or two at a time while adjusting the turkey to ensure the brine flows into the body cavity too. If you find you don’t have enough brining solution, you can quickly make more using the tips from The Spruce Eats mentioned above.
Finally, before you leave your turkey to soak in its saltwater bath, The Spruce Eats recommends putting an ice pack on top. The ice will help keep the turkey submerged in the water, and it will also ensure your turkey stays cold.
Let your turkey brine for up to 24 hours, but at least one hour per pound. Remove it from the brining solution, rinse it, and pat it dry. The drier the skin, the crispier it will be when you cook the turkey.
What Is a Dry Brine?
Think of a dry brine as being just like a wet brine, without the water. You’ll still cover the turkey in salt and let it sit for hours, but you’ll apply the salt manually.
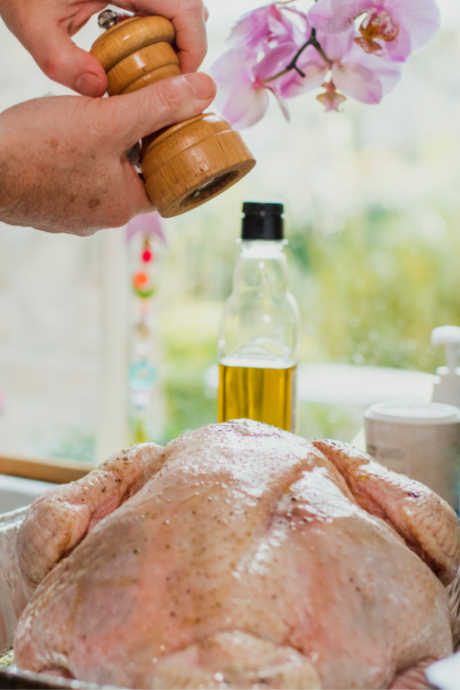
First, dry off the turkey with paper towels. Then prepare your dry brine. Food Network recommends using one-half to three-quarters teaspoon salt for each pound of turkey, while Serious Eats goes with a straight six tablespoons of salt, regardless of turkey size. Either way, both sources also call for baking soda because it helps crisp the turkey skin. Sprinkle the mixture of salt and baking soda over every surface of your turkey. You may have to pat it onto some parts where gravity won’t do the work for you, like the underside of the bird and its appendages, as well as inside the cavity.

Set your seasoned turkey on a baking sheet. Serious Eats recommends putting a cooling rack between your turkey and the baking sheet to help air circulation.
Plan to dry brine your turkey for at least 24 hours. You can let it go for up to 72 hours if you plan ahead. Food Network opts to leave the turkey uncovered, but Serious Eats advises covering it to help retain moisture. Once you’re finished brining, the turkey can go straight into the oven without rinsing, though Food Network suggests basting it with melted butter first.
Wet vs. Dry: Which One Should You Choose?
There are pros and cons to wet brining and dry brining. Both methods require a lot of space in your refrigerator. If you have a second fridge in your garage or basement, this might not be a concern for you. With wet brining, you run the risk of splashes or spills, even with the aid of a brining bag.
Serious Eats ran a fascinating series of experiments with wet brining and documented the results in a feature on The Food Lab. The whole piece is worth reading, especially for the scientific details supporting their conclusions. In short, if you’re going to wet brine your turkey, keep the brining solution limited to salt and water. Cider will “cook” your meat and dry it out, thanks to the effects of acidity on protein. Broth doesn’t add any more flavor than mere salt water because of limitations on the microscopic scale; the molecules that make up other flavors in broth are too large to pass through cell membranes in the turkey meat. It’s only water and salt that are absorbed by the turkey. To make matters even less appetizing, both Real Simple and Serious Eats agree that wet brined turkey mostly tastes...wet. It’s moist, but there’s not much flavor.
Unsurprisingly, both of these sources prefer dry brining, and we can understand why. As Real Simple explains, the salt in a dry brine “draws the turkey’s natural moisture out of the meat.” Then the salt and moisture are reabsorbed into the turkey. No liquid is added, but the salt adds flavor and keeps the moisture from being released when you cook the turkey. You can add other herbs and seasonings to your dry brine too. While they won’t be absorbed into the meat (for the reasons described above), they will be in close contact with the meat and skin during the brining period and will impart flavor that way. Plus, because the meat isn’t watery, the flavor of the seasonings will be more intense.
While we're convinced by the advantages of dry brining, we’re stuck on the convenience of brining in a refrigerator drawer. Here’s the approach we just might try this year: First, we’ll wash our refrigerator drawer and check it for cracks. Then, we’ll line it with a brining bag. Next, we’ll mix up our dry brine of salt and baking soda. After we pat our turkey dry and transfer it to the brining bag, we’ll sprinkle it with our dry brine. Then, we’ll put the refrigerator drawer back in the refrigerator and let our turkey sit for at least 24 hours. We’re hoping this strategy might allow us to enjoy the benefits of dry brining, without sacrificing so much refrigerator shelf space.

