 Free shipping over $49


Avoid Baking Fails: Tools and Techniques
Posted by Julie on Oct 7th 2016
To round out our three part series on avoiding baking fails, today we'll cover tips regarding tools and techniques. Are you using the right tools, and are you using them correctly? That can make a big difference in the results you see.
If you missed Part 1 or Part 2, you'll want to check them out. Part 1 covers baking fails due to ingredient mishaps, and Part 2 focuses on how time and temperature can affect baking.
Avoid Baking Fails: The Right Stuff
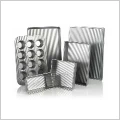
Recipes often specify a particular size pan made out of a specific material, such as a 9x13-inch ceramic baking dish or a nonstick tart pan. Recipe creators do this because they've tested the recipe that way. Just like substituting ingredients, substituting tools can lead to uneven results.

This is especially true if you can't offset the substitution in other ways, like adjusting baking time and temperature. In short, use the tools recommended in the recipe, at least the first time you make it.
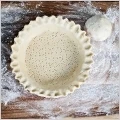
However, we're all for doing a little virtual homework before purchasing tools. Serious Eats tested batches of butter cookies on a variety of cookie sheets, with surprising results. Likewise, we found their series of pie crust experiments informative, especially the close-up photos of how each crust turned out after baking in ceramic, glass and aluminum pie pans.
On the other hand, pie pan findings from similar experiments by The Kitchn turned out quite differently. Ultimately, you may have to endure some trial and error to find what works best for you.
Avoid Baking Fails: Make Your Move
So you've baked your goodies using the right tools, for the set amount of time and at the proper temperature. They may be finished baking, but your work is not done yet.
You'll want to move cookies from the sheet to a wire cooling rack right away. If you leave them on the sheet, they'll continue to bake, even if they're not in the oven.

Likewise, transfer cakes from baking pans to a cooling rack five to 10 minutes after they come out of the oven. While cookies fit neatly on a spatula, cakes can be more challenging.
This smart tip from Food 52 explains how to move your cake without risking breakage: hold it in place between the pan and a cooling rack and flip. This method will also help keep your cake from sticking to the cooling rack.
Avoid Baking Fails: Finishing Touches
Unfortunately, it's still not yet time to dig in. To look and taste their best, baked goods need to spend some time on the cooling rack. Even cookies shouldn't be eaten directly out of the oven -- those chocolate chips can really burn your tongue.
If you're planning to frost a cake or cupcakes, those will need to cool completely beforehand. Most homemade frosting includes butter, which will start to melt when applied to a still-warm cake.

A pie should also cool for at least an hour, even if it's meant to be served warm. The filling needs time to set so it isn't runny. Plus, pie filling straight from the oven is extremely hot. Your pie will taste much better if you let it cool for a bit.
Of course, this three part series isn't an exhaustive list of all the ways you can improve your baking. But we hope you've found a tip or two you didn't know before. Happy baking!