Cookie Decorating Tips for Tasty Pastries
Posted by Julie on Dec 4th 2019
Decorating cookies is a holiday tradition, but it doesn’t always go as smoothly as we hope. We envision creating beautiful cookies worthy of a professional bakery, but our results often fall short of expectations. To help our readers maximize their chances of success, we’ve gathered the smartest tips we could find from bakers who know their way around a sugar cookie and a pastry bag. Keep reading to learn how to handle the dough, whip up the icing, and decorate better than you might expect.
Cookie Decorating: Dough Tips
If you already have a cookie dough recipe that rolls out well and tastes delicious when baked, you can skip ahead to our rolling and baking tips. But if you’re looking for a new recipe, we have a few suggestions.
First, Sally’s Baking Addiction always inspires confidence. Her cookie recipe is simple, with only seven ingredients, and they bake up crisp on the outside and tender on the inside. You can add almond extract or a pinch of cinnamon if you want to tweak the flavor, but two teaspoons of vanilla extract will give these cookies plenty of warmth.
We also frequently turn to King Arthur Flour for recipes, and this butter cookie recipe sounds delicious. It calls for over a cup of butter, along with a flavoring called Fiori di Sicilia that’s exclusive to their shop. It’s a combination of vanilla and citrus flavors, which makes it ideal for cookies like these. You can also use plain vanilla extract.
Finally, while Alton Brown isn’t necessarily known for baking, he’s one of our favorites. His sugar cookie recipe is simple, and we’ll try just about anything he’s created. However, we would encourage you to add at least a teaspoon of vanilla extract for flavor.

The real secrets we discovered concern chilling and rolling the dough. Both King Arthur Flour and Alton Brown caution against chilling the dough in one big lump. Instead, divide the dough into two or more portions and flatten it before chilling. Be sure to watch the video for Alton’s recipe. Also, while his recipe calls for wrapping the dough in waxed paper, we recommend plastic or parchment paper. Waxed paper can stick to dough and create a mess. Either way, you’ll need to allow the dough to warm up a bit before rolling it out.
Sally’s Baking Addiction offers a different strategy that we’re eager to try. She doesn’t just flatten the dough before chilling -- she rolls it out to a quarter-inch thickness, ready for cutting. Use parchment paper or silicone baking mats to hold the rolled-out sheets of dough in the refrigerator. We like this approach because it offers the same advantage of chilling pie crust before baking; when the butter in the dough is cold, it makes the finished pastry more tender.
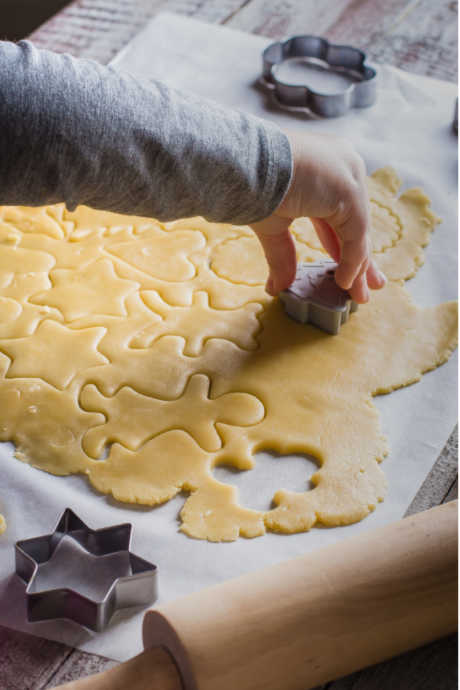
Both King Arthur Flour and Sally’s Baking Addiction recommend cutting out the cookies while the parchment or baking mats is directly on the baking sheet. This way, you can avoid transferring the dough cut-outs and possibly losing a star point or gingerbread man’s limb along the way. Use an offset spatula or even a butter knife to remove the dough scraps, and then roll them out again. If you feel like the dough has warmed up too much, we like Alton’s suggestion of placing a cold baking sheet on top to help chill it. Just be sure to have a baking sheet on standby in the freezer for this purpose.
Cookie Decorating: Icing Tips
Unlike buttercream or ganache, nobody makes royal icing because it’s tasty. Royal icing is used for decorating cookies because you can outline, flood, and pipe it into fun and festive designs. If you have a royal icing recipe that works well, you can skip ahead. But if you’d like to learn more about how to make royal icing that’s easy to work with and doesn’t taste like glue, keep reading.
Marian from Sweetopia is a fantastically talented cookie decorator, so we went straight to her site for some tips. Naturally, we also checked out Sally’s Baking Addiction for her royal icing recommendations. We’re happy to report both sources offer tried-and-true royal icing recipes that are remarkably similar. Both call for confectioner’s sugar, meringue powder, and water. If you need a lot of royal icing, go with the quantities on Sweetopia. If you don’t need quite as much, opt for Sally’s Baking Addiction.

Either source can help you determine whether your royal icing is the right consistency for decorating. You want it to be thin enough that it floods properly, but thick enough to stay in place after you’ve piped it. Watch the videos on Sweetopia and Sally’s Baking Addiction to see their respective methods of gauging consistency.
How thick should your icing be? That depends on your personal preference. Marian from Sweetopia prefers hers on the thicker side. It gives her more control, since the icing doesn’t flow as quickly from the piping bag. Sally’s Baking Addiction opts for somewhat thinner icing. It may take a few tries for you to determine what works best for your skill level.
Finally, both sources advocate for gel food coloring. Liquid food coloring is ideal for blending into cookie dough or creating light pastel colors. Gel food coloring is highly concentrated to yield more saturated colors using less coloring. Remember that icing will look darker after it dries, so you can use even less coloring than you might expect.
Cookie Decorating: Decorating Tips
We’ve arrived at the fun part: Decorating your cookies! This part might also be challenging, but take another tip from Sally’s Baking Addiction and keep your expectations low. Even with the helpful guidance we’re sharing from experts, there’s no substitute for practice. Imperfect cookies taste just as good.
One way to improve your decorating is to start with large cookie cutters that have simple designs. Small, detailed cutters will yield cookies that bake unevenly and are more challenging to decorate. King Arthur Flour recommends large cookie cutters for beginners and kids. We also know from experience that cookies will bake more evenly if each tray is full of similar shapes and sizes. A bunch of different cookie cutters isn’t necessary if you decorate all your cookies differently.
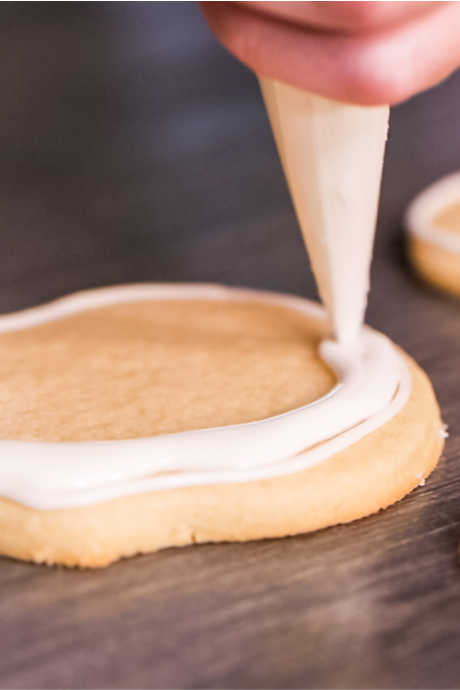
Start with basic outlining and flooding techniques by watching this video on Sweetopia. Marian makes it look so easy, but remember how long she’s been practicing. Don’t get discouraged if you can’t wield a pastry bag with the same finesse she does. Use a thin pastry tip for outlining your cookies, and a thicker tip for flooding. Then pop any air bubbles in the icing with a toothpick, and shake each cookie gently to help the icing settle into a smooth layer.
When you’re ready to challenge yourself even more, try these methods from King Arthur Flour. Flocking is a fancy term for covering a cookie in sprinkles. While the icing is still liquid, shake or spoon sprinkles over the surface of the cookie. Tilt the cookie slightly and tap it gently to remove any excess sprinkles. Decorate over a piece of parchment paper to catch the excess sprinkles and reuse them on the next cookie.

Marbling is a surprisingly easy way to create an impressive decorating effect. After you’ve flooded the cookie in one color, add dots or lines in contrasting colors. Then use a toothpick to pull or swirl the icing colors together in zigzag, wave, or loop patterns. Have fun experimenting with marbling; it’s a neat way for kids to get creative.
Quilting takes patience and vision, but it results in a fantastic 3D effect. Instead of outlining the full perimeter of the cookie, you’ll outline and flood several sections. After the icing has dried, you’ll outline and flood the remaining sections. Quilting can be done in either the same color or contrasting colors. King Arthur Flour recommends drawing the design on the surface of the cookie with a food-safe marker. Then you can divide up the sections and determine the order and colors you’ll use. Plan ahead: Quilting requires time and space, since the cookies will need to dry for several hours between each round of outlining and flooding. But the results ought to be worth the hassle.

