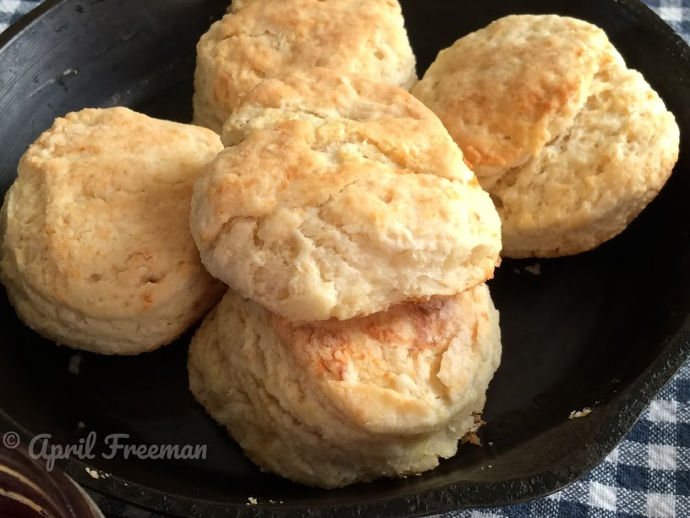
Homemade Biscuits: Hot, Flaky and Delicious
Posted by April on Dec 20th 2018
Whether you like them smothered in gravy, smeared with apple butter, drizzled with honey or just plain, homemade biscuits are a scrumptious addition to many meals. You can eat them as traditional breakfast fare, along with eggs and bacon, or whip up a batch to accompany soups, stews, and casseroles.
While canned and frozen biscuits are quick and convenient, there is no comparison to a flaky, tender homemade biscuit. Don’t be intimidated by making homemade biscuits. With a little practice and the following tips, you can prepare a batch of delicious biscuits.
Homemade Biscuits: Techniques and Tips
Biscuit making is more about technique than the specific recipe. While you should follow the recipe closely, it takes time and practice to learn exactly how much liquid to add, how to stir the dough without toughening it, and how to roll and cut the biscuits gently. Don’t be discouraged if your first few batches are less than amazing. Keep practicing, and after four or five batches you will be much more confident.
While you can make biscuits with shortening and fat-free buttermilk, they’ll be much tastier if you use real butter and full-fat buttermilk. You should also handle the dough gently after you’ve added the liquid. Save your pounding for yeast breads. Biscuit dough needs a soft touch to maintain those flaky layers and tenderness.
You can bake biscuits on a cookie sheet or in a cake pan, but the most amazing biscuits are made in an old-fashioned, heavy cast iron skillet. Baking in cast iron gives the biscuits a slight crust on the outside while the insides become steamy, flaky and delicious.

Some bakers use a food processor to whip together the butter and dry ingredients, but a pastry blender works just as well. Even with a food processor, you have to transfer the mixture to a mixing bowl before adding the liquid ingredients.
Use a biscuit cutter to keep your edges sharp and help the biscuits rise higher while baking. If you don’t have a biscuit cutter, you can use a sharp knife to cut square biscuits.
Homemade Biscuits: My Personal Recipe
Tips and techniques are helpful, but a tried-and-true biscuit recipe is essential. I've shared my own family's recipe below.
Ingredients:
- 2 cups all-purpose flour*
- 1 teaspoon salt
- 1/4-teaspoon baking soda
- 3 teaspoons baking powder
- 1/2-cup butter cut into chunks (You could use shortening or lard in a pinch, but butter tastes best.)
- 1/2- to 1 cup of full fat buttermilk (Over time, you will learn how to gauge the proper amount. Don’t just dump it in the bowl; add it a little at a time while mixing the dough.)
Preheat the oven to 400 degrees.
In a large bowl, stir together the flour, salt, baking soda and baking powder. Add the butter and blend with the dry ingredients using a pastry blender. Cut the butter into the flour mixture until it resembles cornmeal. Leaving a few small flakes of butter is okay. Slowly, mix in your buttermilk. Add a little at a time, and stir just until the dough begins to stick together. You’ll want all of the flour mixture to be wet, but not wet enough to be a gooey mess. Take your time and stir gently.

Once the dough begins to stick together, it’s time to roll out the biscuits. Handling the dough gently, dump it from the bowl onto a lightly floured surface. Press the dough into a rough ball and use a lightly floured rolling pin to roll it to a 1-inch thickness. Using a biscuit cutter, cut the rounds and place them in an ungreased pan about a quarter of an inch apart. Gently press together the leftover scraps of dough and re-roll and cut.
Bake in the oven at 400 degrees for 10 to 15 minutes, or until the tops are golden brown. When you remove the biscuits, gently brush the tops with melted butter and serve piping hot.
*Self-rising flour can be used. Use two cups of flour and omit the salt, baking soda, and baking powder.
As an avid farmer, gardener, and cook, April Freeman is an expert in the food production process. She raises pigs, chickens, beef cattle, and grows a wide variety of vegetables and fruits on her family farm in Tennessee. Learn more about April’s firsthand experience with farm-fresh food on her blog, Feeding My Family.
 Free shipping over $49


