Keep It or Toss It: Cast Iron
Posted by Julie on Jun 3rd 2019
Cast iron cookware is one of our favorites because it’s practically indestructible. But it’s not always easy to tell whether a piece of cast iron is destined for the scrap heap, or if it simply needs a little TLC. The good news is that most items can be saved by investing time and elbow grease. The even better news is that cast iron is surprisingly easy to care for, if you know what you’re doing. Keep reading to learn how to bring cast iron back to its former glory and keep it there, or how to know when it’s time to part ways with a piece that’s beyond repair.
Keep It: How to Restore Cast Iron
When we say that cast iron is practically indestructible, that’s not hyperbole. Its longevity is all in its name: Iron, well known for its durability, is cast in a mold to create an entire pan. There are no parts that may come loose or fall out or break off. Unless your pan cracks in half, not much can happen to it. Both vintage and modern cast iron cookware is made this way. In fact, vintage cast iron is often somewhat lighter weight than modern pieces.
But cast iron does rust easily, and not everyone knows how to season and maintain cast iron properly. That’s when it’s time to wipe the slate clean and restore your cookware. Whether the piece in question came from an antique shop or your own kitchen cupboard, the process is the same. First, you’ll need to remove the rust. Then, you’ll season the pan just as you would if you were buying a new one that’s not pre-seasoned.

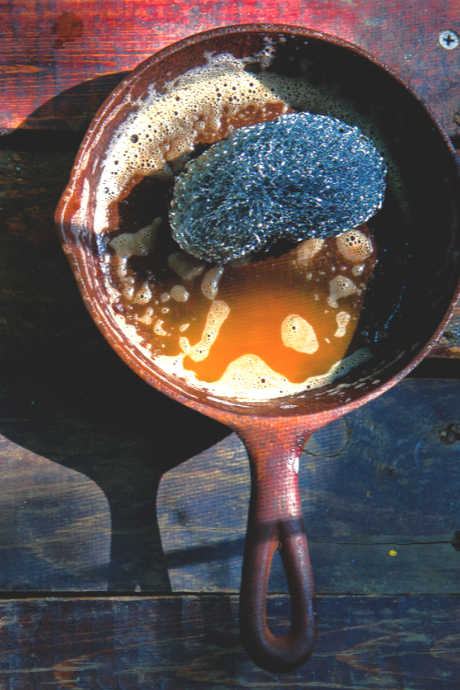
Start by assessing the extent of the rust on your cast iron. As long as the pan hasn’t been left out in the elements, the rust should be limited to a thin layer or assorted spots. You can scrub it away with fine gauge steel wool. If it’s especially stubborn, try soaking your pan in a solution of equal parts vinegar and water. Check it every hour or so to see if the rust is loosening. Don’t leave your cast iron in this solution any longer than necessary though, as it will start to pit the surface of your pan.
If the accumulated gunk on your cast iron is more than steel wool or vinegar and water can handle, you can pull out the big guns. The least scary option is to get a can of Easy Off oven cleaner. Spray all surfaces of the cast iron, seal it in a garbage bag for 24 hours, and then scrub with steel wool. If this approach doesn’t work, you can soak it in a lye solution for 24 hours before scrubbing. (Remember to add lye to water, not water to lye.) As intimidating as lye can be, it won’t harm your cast iron. If all else fails, you can get your pan sandblasted by a professional, though at this point it might be time to say goodbye.
Keep It: How to Care for Cast Iron
Whether you’re restoring old cast iron or seasoning a new pan for the first time, the steps are the same. We’ve discussed seasoning cast iron before, but we’ve got a few new tips to share here.
First, wash the pan with dish soap and water. Contrary to what you may have heard, dish soap is tough on grease, not cookware. Be sure your pan is clean and dry before seasoning it. Even the slightest bit of moisture on raw cast iron can promote rust.
Then rub every surface of your cast iron with oil: the interior, the base, all around the sides, and the handle too. Use a cooking oil that’s high in unsaturated fats, like vegetable oil or canola oil. This isn’t a matter of health; unsaturated fats are preferable because they are more chemically reactive. They will harden into that sought-after layer of seasoning more readily than animal fats like lard or shortening.

Don’t leave any streaks or pools of oil on your cast iron. Rub the oil into the pan and wipe away any excess. The smoother and thinner each layer of oil you apply, the more easily it will polymerize into that glossy, seasoned surface.
Put your oiled and buffed pan into a hot oven, upside down on top of a baking sheet to catch any stray drops of oil. The Kitchn recommends an oven temperature of 350ºF for an hour, while Serious Eats calls for 450ºF for half an hour. Either way, repeat this process anywhere from three to five times, until the surface of your cast iron looks and feels the way you want it to.
Going forward, all you really need to do to maintain your seasoning is cook with your pan. Yes, it’s really true. The seasoning is built up layer by layer over time. Metal spoons and spatulas won’t hurt it, and neither will soap. You shouldn’t need to use much soap though, as the surface will become increasingly nonstick over time. Clean your cast iron, dry it thoroughly, and rub it with a dab of oil before storing. To help mitigate the risk of any remaining moisture, try placing paper towels in between pieces of cast iron cookware. It will help protect the seasoning too.
Still have questions about caring for cast iron? Check out this video from the American Chemical Society with do’s and don’ts, facts and fiction about cast iron.
Toss It: When Cast Iron Can’t Be Salvaged
There are rare occasions on which a piece of cast iron is better suited for the junk heap than your kitchen. As we noted earlier, if you need to sandblast it to remove old seasoning and rust, that may not be worth the expense and effort.
Likewise, a cracked piece of cast iron is one you should give up. You can’t fix it, and that crack will allow moisture to penetrate your pan. Eventually the pan will break along the crack. If you’re considering a piece of antique cast iron, inspect it carefully. Then thump the base of the pan and listen for a ringing sound, which signals an intact pan. If you hear only a dull tap, it’s likely a crack is hiding under layers of rust and seasoning.
Another flaw to watch for is pitting. Modern cast iron will have a bumpy surface because it’s made in sand casts, but pitting is deeper and more irregular. The concern with pitting is that it’s hard to get an even layer of seasoning when the surface of your pan is uneven. A small amount of pitting shouldn’t cause too much trouble, but you’ll need to evaluate how much you’re willing to tolerate.
We’ll close with this story from Kat Kinsman on Extra Crispy about her quest to revive a cast iron pan that was in awful shape. She had to let go of one pan that was cracked, but the before-and-after pictures of this one are truly inspirational. They’re also proof that you’ll almost never need to toss cast iron.
 Free shipping over $49


