Old-Fashioned Homemade Fudge
Posted by Julie on Dec 23rd 2019
Fudge recipes are a dime a dozen, but if you look at the ingredient list closely, you’ll find they include sweetened condensed milk or marshmallow creme. They aren’t the sort of old-fashioned homemade fudge your grandmother made. We can still see our own grandmothers holding a heavy stockpot with a candy thermometer clipped to the side, stirring intently as they monitored the status of the heavenly candy inside.
In the post, we’ll look at the science that goes into making fudge smooth and creamy. We’ll also explain why various tools and ingredients are essential to getting good results. We hope you’ll be inspired to try making old-fashioned homemade fudge yourself!
Homemade Fudge: Get Ready
Fudge doesn’t call for many ingredients, nor does it require specialized tools. However, your success will depend heavily on a candy thermometer. There are other ways to gauge temperature, but they are imprecise and involve handling a boiling mixture of sugar, chocolate, and milk. Beginners are much better off with a candy thermometer.

Make sure your candy thermometer is accurate. This step is especially helpful if you’re cooking at altitude, like us. Water boils at a lower temperature above 5000 feet elevation. That also means you won’t need to heat your fudge to the same temperature you would at sea level. Jenni of Pastry Chef Online offers helpful guidance for testing your candy thermometer and adjusting the cooking temperature for your fudge. Boil water and see what temperature your candy thermometer displays. For every degree below 212ºF, subtract a degree from the cooking temperatures in your fudge recipe. Precise temperature control is one way you can make or break your fudge, so this step is key to success.
Once your fudge has boiled and cooled, and you’ve stirred it until it’s thickened, you’ll transfer it to a pan to harden. Prepare that pan ahead of time by lining it with foil. Then lightly butter the foil. Check out these smart tips from Better Homes & Gardens for lining your pan easily. Also, butter the inside of the pot you’ll use to boil your fudge. Don’t leave chunks of butter on the sides; you only want a light sheen to keep the boiling sugar from sticking.
Finally, be sure to have corn syrup on hand. It’s not merely for adding sweetness. The sugar molecules in corn syrup help inhibit the formation of crystals. We’ll explain more about how this process works (and how it relates to temperature, which is why a candy thermometer is essential). In the meantime, add corn syrup to your shopping list.
Homemade Fudge: Boiling
Candy making is risky business. Boiling sugar can be dangerous. Therefore, we recommend that you keep the kids out of the kitchen. There are plenty of cooking and baking projects that are perfect for including kids, but homemade fudge isn’t one of them.
Add your ingredients (including corn syrup) to the buttered pot and turn the heat to low or medium-low. Stir the mixture with a wooden spoon as it heats up. Once all the ingredients have melted together, turn the heat up to medium and clip the candy thermometer to the side of the pot. Make sure the bulb is submerged in the liquid, but not touching the bottom of the pot.
At this point, the sugar crystals in your ingredients have dissolved. The objective is to keep them from re-forming. Stirring promotes crystal formation. That’s why you must stop stirring once the mixture boils. That’s also why you butter the inside of the pot: it discourages your mixture from clinging to the sides and forming crystals as it cools. You can also moisten a pastry brush in warm water and gently smooth away any dried bits on the inside of your pot.
Watch the candy thermometer closely as your fudge boils. You’re aiming for a temperature of 234ºF, plus or minus however many degrees your thermometer was off when you tested it in boiling water. Why does precision matter? The Spruce explains that temperature is directly related to the consistency of your fudge. Cook it too long, and your fudge will turn out grainy and crumbly. Don’t cook it long enough, and your fudge won’t solidify.
Homemade Fudge: Cooling
Once your candy thermometer reaches the target temperature, turn off the heat. Leave the candy thermometer in place and do not touch your fudge. Leave it alone until the candy thermometer reads 110ºF. If you stir it, you’ll ruin it. Remember that stirring promotes crystal formation. A single seed crystal can start the process, and it will keep growing as your fudge cools. For smooth, creamy fudge, it’s essential to let it cool before you begin stirring.
If you’re curious as to why this point is so important, it relates to the chemistry of fudge. The San Francisco Exploratorium has an entire website about the science of food, and they explain how fudge is a supersaturated solution. That means the temperature fluctuations allow more sugar to dissolve in the mixture than would be possible at room temperature, which makes it unstable and prone to recrystallization.
Homemade Fudge: Stirring
Up to this point, the objective has been to prevent crystal formation. That’s why we added corn syrup and allowed the fudge to boil and cool without stirring. Now that the fudge has cooled significantly, we want crystals to form. The difference is that now the crystals will be small, which means the texture of the fudge will be smooth and creamy. Why are they small? Because the temperature is lower, so they have less time to grow before the fudge solidifies. Also, stirring now will actually help minimize the size of the crystals.

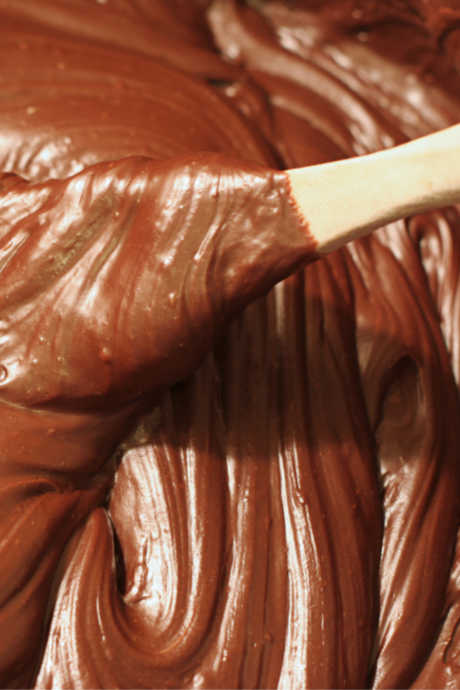
Get out your wooden or silicone spoon, and start stirring. Stir constantly and with enough force to agitate every bit of your mixture. Unlike the precision of reaching a set temperature while boiling, you have to go by looks and feel while stirring. The fudge will start to look less shiny and more matte, and it will start to thicken. This process can take nearly half an hour, and you need to stir the whole time, so make sure you can give it your undivided attention.
Pour the fudge from the pot into your prepared pan. It should be fluid enough to pour, but significantly stiffer than when you started stirring. Again, there isn’t a specific amount of stirring or a target temperature. This part of making homemade fudge is based on experience. What a great reason to make lots of batches of fudge!
Finally, leave behind whatever bits of fudge cling to the sides and bottom of the pot. The texture will be gritty, and they’ll detract from the smooth, creamy fudge you’ve worked so hard to make. But feel free to enjoy the leftovers yourself: Stir them into coffee or ice cream.
Once your fudge has fully hardened, you can cut it into individual squares. They don’t need to be refrigerated, but wrapping them in plastic will help keep them looking and tasting delicious. If your fudge didn’t turn out quite like you imagined, practice more with another batch or two. It’s the perfect holiday treat!
 Free shipping over $49


