 Free shipping over $49


8 Steps to Perfect Crepes
Posted by Julie on Aug 30th 2018
Crepes are for more than just breakfast. This versatile French classic is delicious whether you serve crepes with sweet or savory toppings, any time of day.
Crepes aren’t nearly as tricky as you might think. We’ve done some research to find the top tips for making crepes. Below, you’ll find eight key steps to whipping up delicious crepes that are sure to impress.
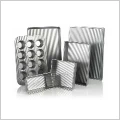
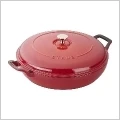
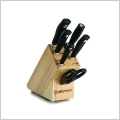
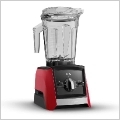
Step 1: Assemble Your Cookware and Tools
We’re happy to tell you that you probably already have everything you need. A blender to mix the crepe batter, a nonstick pan to cook the crepes, and a plastic or silicone spatula to help flip. Don’t be persuaded to buy an electric crepe maker; unlike waffles, crepes can be made on the flat surface of a nonstick pan. A crepe pan is nice to have, due to the low sides and heavy bottom that heats evenly. But it’s fine to start with your favorite nonstick skillet.
Step 2: Assemble Your Ingredients

Crepes themselves are quite simple; it’s the filling where you can get fancy. Basic crepe batter includes eggs, milk, flour, butter, and salt. You can tweak the flavor by adding vanilla extract, sugar, or herbs based on whether your crepes will hold sweet or savory fillings.
Step 3: Mix Your Batter
In Step 1, we mentioned that you’ll need a blender or an immersion blender. You could whisk your ingredients together and run your batter through a fine mesh sieve. But the easier way to get the smoothest crepe batter possible is to use a blender. The texture of the batter is what makes crepes so light and thin. The consistency of the batter is also important; it should coat the back of a spoon. If it’s too thick, whisk in some milk until it’s the right consistency.
Step 4: Rest Your Batter
Put your batter in the refrigerator and leave it alone for at least an hour. While the batter is resting, the flour fully absorbs the liquid, and the gluten relaxes. This step helps ensure your crepes turn out delicate and lacy. If you plan to have crepes for breakfast, mix the batter the night before and let it rest in the refrigerator until morning.
Step 5: Prep Your Pan
Preheat your pan on medium-low or medium heat. It’s important to keep the heat low enough that the batter can spread out evenly before it starts to cook. You can use a neutral oil or butter, which adds more flavor. On Chatelaine, they recommend using a pastry brush to get a light layer of butter on your pan.
Step 6: Pour and Swirl Your Batter

Crepes are meant to be thin, so you want to pour only as much batter as it takes to cover the bottom of the pan. Try using a measuring cup with a spout or a ladle to help control the amount of batter. Then tilt the pan to swirl and spread the batter.
Step 7: Cook and Flip Your Crepes
Because crepes are so thin, they don’t take long to cook. For perfect crepes, stay right by the pan and watch for the edges of your crepe to turn brown. Then use a plastic or silicone spatula to lift the edges and loosen the crepe from the pan. You can flip the crepe with a spatula or even your fingers. The other side of the crepe will take almost no time to cook — only 30 seconds to a minute.
Step 8: Fill and Serve Your Crepes
There are so many ways to fill crepes, whether sweet or savory. Whipped cream, cream cheese or mascarpone cheese, melted chocolate, fresh fruit, and homemade jam are all delicious ways to top your crepes. You can also go the savory route and fill your crepes with meats, cheese, vegetables, and savory spreads. Enjoy!