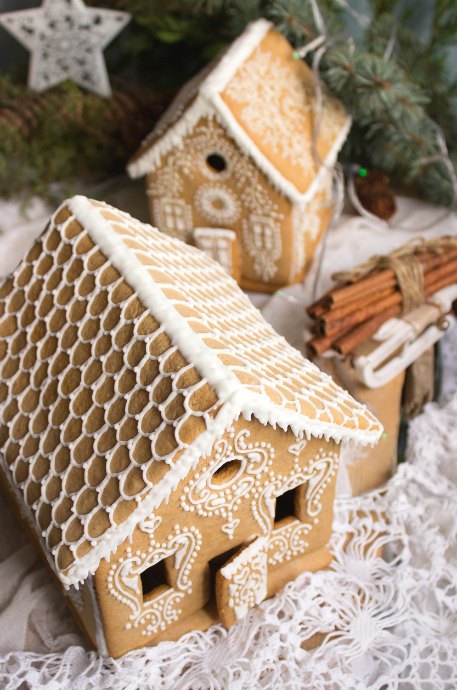
Make Your Gingerbread House Merry
Posted by Julie on Dec 16th 2016
Have you ever made a gingerbread house? While it can be a time-consuming and fairly messy endeavor, it can also be a fun family project for the holidays. You can even build your gingerbread house after Christmas, while you're waiting to send the kids back to school.
Before leaping into construction, take a little time to draw up plans for your gingerbread house ideas. Check out the expert tips and tricks we've gathered to help you create the house of your dreams.
Gingerbread House Ideas: Make a Plan
First, you'll want to think about what you want your gingerbread house to look like. Not only is this post from Jenny McArthur on Remodelaholic filled with sage advice, it also has several gorgeous photos of finished houses that are sure to spark your imagination.
You can search online for templates to print and trace onto cardboard or foam board. This guide from King Arthur Flour includes a basic template. You can also draw your own template based on the details of your chosen design. These will be important when it comes time to cut your sheets of gingerbread.

Essential kitchen supplies for this project include a rolling pin for rolling out the gingerbread and cookie sheets for baking it. McArthur cautions that the cookie sheets must be flat. Warped cookie sheets will result in warped gingerbread walls and roof pieces!
A sharp knife on the smaller side, such as a paring knife, will be necessary for cutting the gingerbread. Finally, as McArthur notes, if you have a stand mixer, it will be really helpful in this project.
Gingerbread House Ideas: Get Baked
While gingerbread used for building houses is edible, we don't recommend using the same recipe that you use for cookies. Construction gingerbread includes more flour than gingerbread cookie dough, which helps make it drier and more durable.
We found two gingerbread house recipes we'd trust. The first is from Jenny McArthur, who can trace the history of her recipe back to Germany. It's been used to create gingerbread houses for decades.
We also approve of this recipe from King Arthur Flour, which includes a royal icing recipe too. (More on royal icing in a bit.) If you use this recipe, try margarine instead of butter; Chef John Hart advises that margarine will make your gingerbread even stronger.
After rolling out your gingerbread, Chef Matthew Lodes recommends letting it rest for several hours. This will help prevent it from rising. Before baking, place your cardboard or foam board patterns on top of the rolled out gingerbread and cut through the dough all around each of the shapes. When it comes out of the oven, go over those same cuts again. Then you can cool the individual pieces on cooling racks.
Likewise, when baking gingerbread for houses, you'll want to bake it longer than you'd bake cookies. Then it should sit out and dry thoroughly before you begin building. McArthur says drying gingerbread for two weeks is optimal, but we don't have the patience for that. Chef Dana Herbert suggests two days will do, but keep the moisture level down with a dehumidifier.
Gingerbread House Ideas: Under Construction
Royal icing is the glue that will hold your gingerbread house together. Mix up a batch of it and spread the royal icing onto the edges of the pieces of gingerbread you want to connect, just like you would glue pieces of cardboard together. You can use a pastry bag and piping tip too, which may give you more control and be tidier.
We found some smart tips to keep your royal icing in top shape. First, put a damp towel over the bowl of icing when you're not using it. This will keep it from drying out, which makes the icing difficult to work with. Also, Chef Matthew Lodes recommends adding distilled vinegar to your royal icing. It won't taste very good, but it will harden faster.

If you want to fortify your gingerbread house even more, check out what the engineers have to say. Melted marshmallows and gummy bears are even stronger than royal icing. Consider using either of these to construct your house, and then pipe royal icing over the seams for decoration and added stability.
Finally, let your house dry between construction stages, and use supports like cans and straws to help keep everything in place while it dries. Be especially sure that the base of your house is sturdy before adding the roof pieces.
Gingerbread House Ideas: Deck the Walls
Remember all those gorgeous ideas in the link at the top of this post? Those can help with decor inspiration too. You'll want to draw up some design plans before you shop for candy or start sticking it to your house.
But first, check out these tips and tricks we discovered that may guide you as you design. Chef Matthew Lodes notes that smaller candies are preferable. Not only do they let you add more detail to your decor, they stick to the royal icing more securely than larger, heavier candies. We'd also add that it's best to avoid chocolate candy, except in a shell like M-n-Ms.
If you plan to pipe designs on the exterior walls, do it before you assemble your house. Make a royal icing wash by thinning your royal icing with water and a little bit of corn syrup. Then paint your gingerbread walls with it and let it dry. You can even add food coloring to make your walls any color you like.
Jenny McArthur advises the royal icing wash has a long dry time, so factor in several more hours. You'll need to wait until the walls are dry before piping on additional designs or adding candy, and then wait again before assembling your house.
Try making stained glass windows with gelatin sheets or crushed and melted hard candies. You can also use sugar cones for pine trees, Necco wafers for roof tiles, candy sticks for pillars, Smarties for rock details, sugar wafer cookies for siding, pretzels for trim -- the possibilities are endless! Just don't eat too many of your materials while you're decorating.

